How to Setup Custom Domain on Blogger with GoDaddy.com 2021 New Panel

How to Setup Custom Domain on Blogger with GoDaddy.com 2021 New Panel Blogger Custom domains are more like a Vanity URL for your BlogSpot ...

How to Setup Custom Domain on Blogger with GoDaddy.com 2021 New Panel

How to Setup Custom Domain on Blogger with GoDaddy.com 2021 New Panel

Blogger Custom domains are more like a Vanity URL for your BlogSpot blog. It will allow you to create a better and easy to remember URL. (for example : from yourblog1234.blogspot.com to yourblog.com)

Blogger allows you to seamlessly integrate with any domain name. To start off you have to make your GoDaddy domain to point to Google's servers. This simple tutorial will guide you step by step with screenshots and instructions to make it easier for you.

How to Setup Custom Domain on Blogger with GoDaddy.com 2021 New Panel


Blogger Custom Domain on GoDaddy

Buy a domain name from GoDaddy.com. Domain name are not free but they cost around 10-12$ per year. While buying make sure that you don't buy the hosting or website builder packages from GoDaddy as these are not required for setting up a Blogger blog.

Once you have bought the domain name of your choice, login to your GoDaddy account and go to the domains section as shown in the below screenshot.

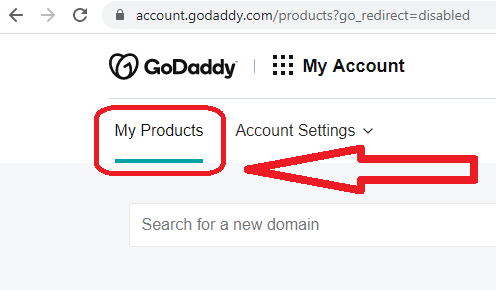
STEP 1: Go To Visit My Account >> My Products


Godaddy My Products


STEP 2: Go To Domains >> Click Manage

Godaddy Domain Details

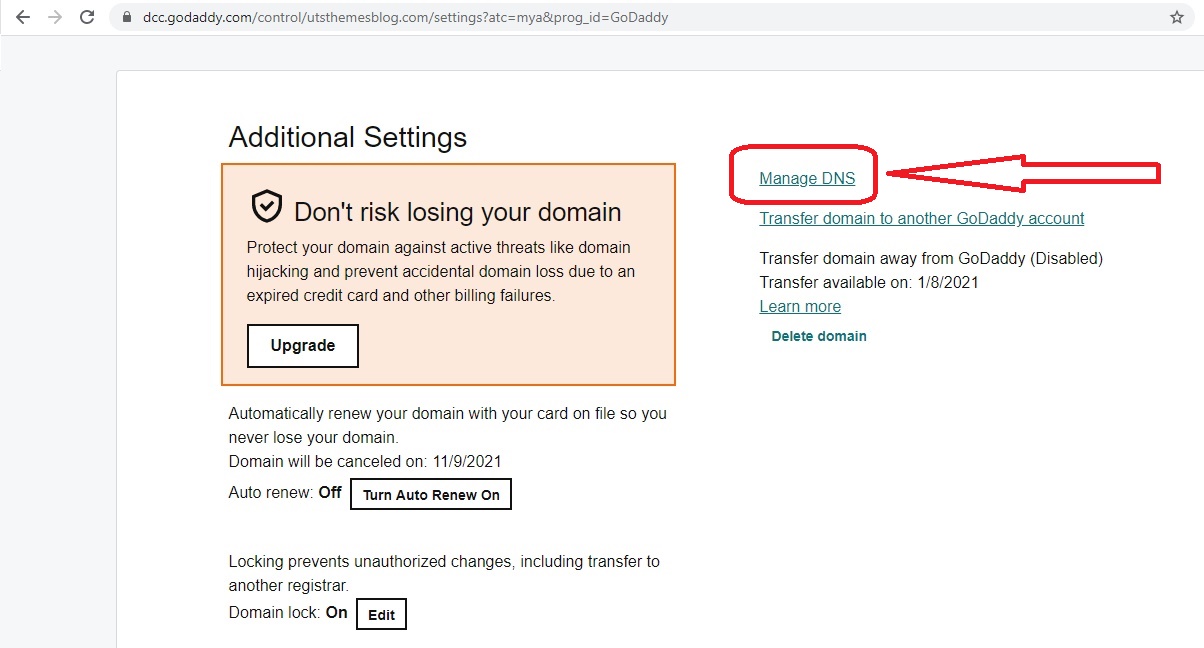
STEP 3:  Go To Additional Settings >> Manage DNS

Godaddy Manage DNS

STEP 4:  Use Scroll And Go To ADD

GoDaddy ADD

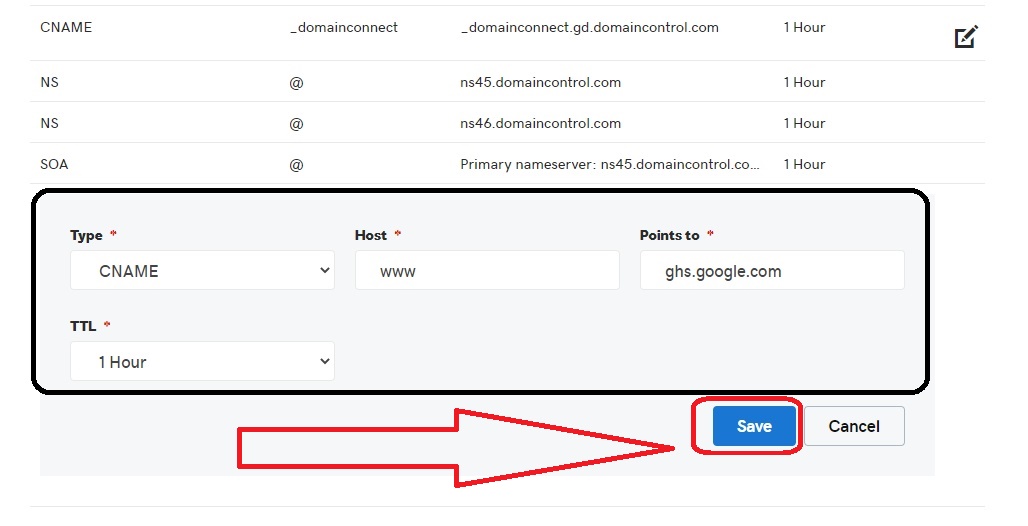
STEP 5:  Fill in the details for the CNAME record as shown in the image

Godaddy CNAME

The Details To Use Are :
Record Type : CNAME
Host : www
Points to : ghs.google.com
TTL : 1 hour

STEP 6:  Now we have to create 4 more records in a similar fashion. The details to fill up while creating the records are as below.

Godaddy A Records

Once done, you should see only 4 records under the A Host section and those should be

  • [col]
    • Sl #
    • Record Type
    • Host
    • Points To
    • TTL

  • [col]
    • 1
    • A
    • @
    • 216.239.32.21
    • 1 Hour

  • [col]
    • 2
    • A
    • @
    • 216.239.34.21
    • 1 Hour

  • [col]
    • 3
    • A
    • @
    • 216.239.36.21
    • 1 Hour

  • [col]
    • 4
    • A
    • @
    • 216.239.38.21
    • 1 Hour

Any other A record shown under the A Host section with Host value set to @ should be deleted using the Delete icon under Actions(This step is very important)

STEP 7:  You are now Done with GoDaddy settings. You now have to configure your Blogger blog to publish to this new domain.


Publishing BlogSpot blog to Custom Domain

Now we will configure the Blogger blog to publish itself to the new Custom Domain name.

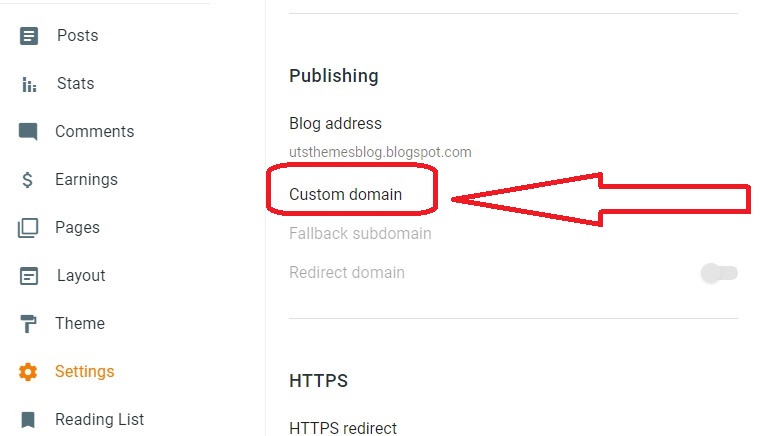
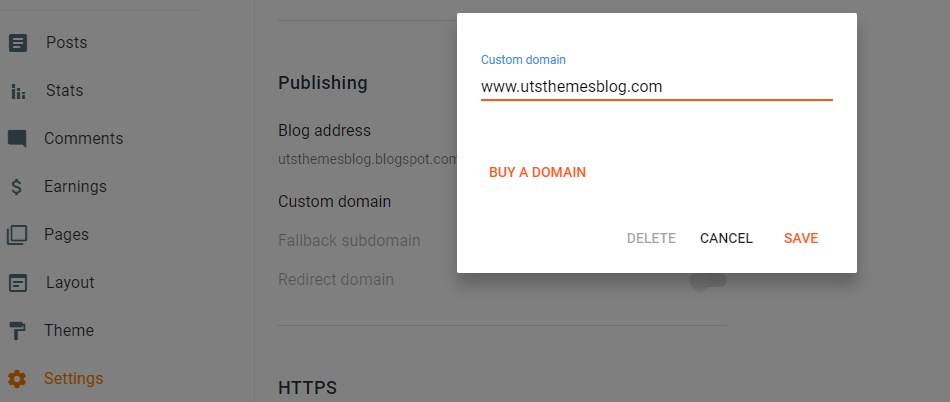
STEP 1: Login to your Blogger Dashboard and Navigate to Settings >> Publishing >> Custom domain


Blogger Custom domain


STEP 2: Provide your Custom Domain URL and click the Save Button

Blogger Third Party URL

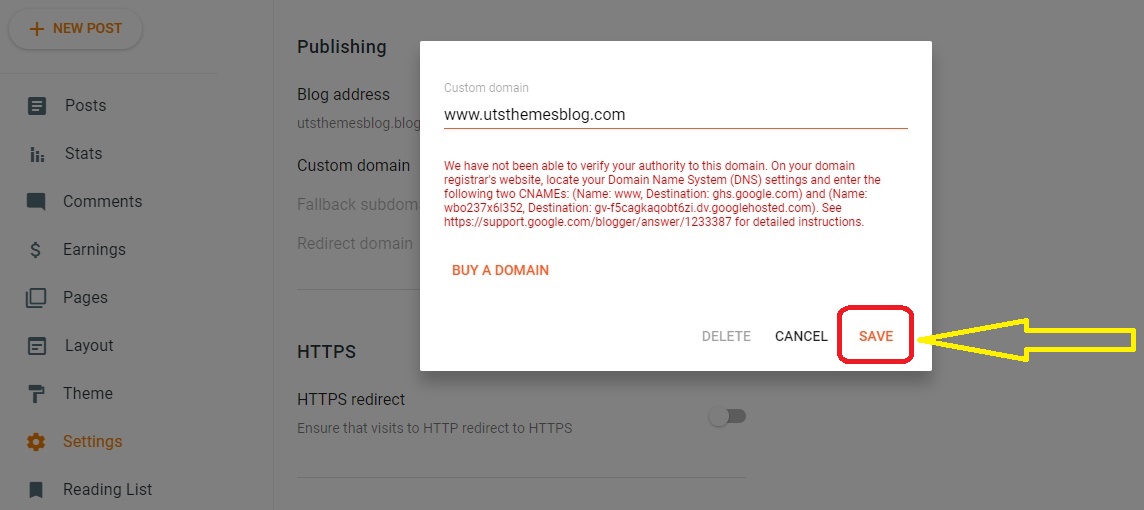
STEP 3: When you click save, you might get an error like the one shown below

Blogger Error Like The One Shown

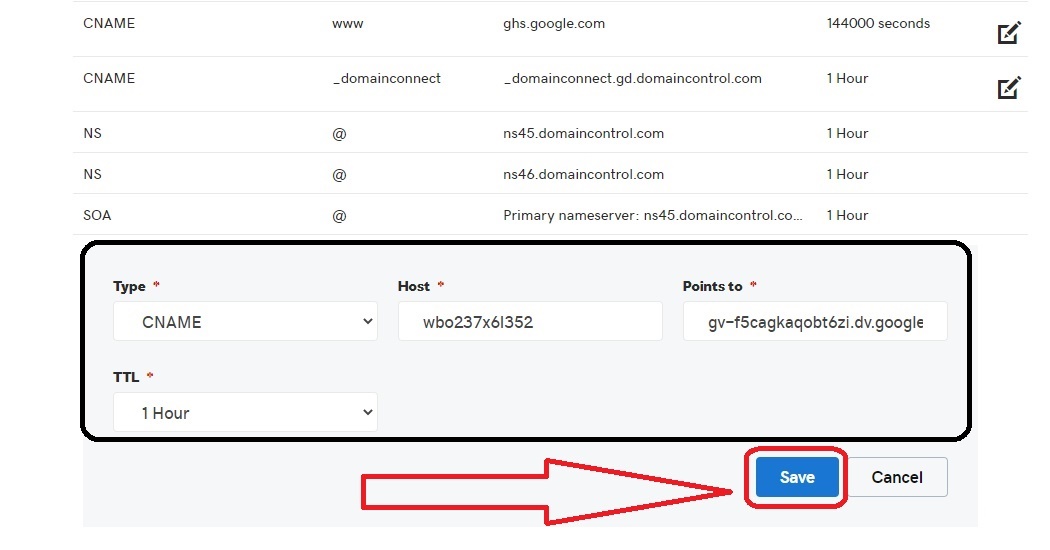
This means that Blogger wants us to create another CNAME record on GoDaddy to verify that you are the owner of the domain. The values for Host and Points To should match what’s shown on the Blogger error. An example based on the above error is shown below.

STEP 4: Go To STEP 4 To ADD

Godaddy ADD

STEP 5: Now go back to Blogger and click on the "Save" button once again. This time the verification error should go away.

Blogger Verification

STEP 6: Now ON The Redirect Domain

Blogger Redirect Domain

Now your blog should be visible at your new domain.

The DNS changes which we had made (the A and CNAME records) might take some time to propagate. So give it 24 hrs in case you aren't able to see the changes immediately. In case you need more help, you can always contact us via comments, contact form or via social media channels :-)

Disclaimer: The screenshots are based on the GoDaddy and Blogger interfaces at the time of writing this post. In case you find any differences, do let us know so that we can update the post and help others.

COMMENTS

Name

Ads-Blogger,13,Blog,12,Blog-Blogger,6,Blog-Wordpress,1,Blogger,30,CMS,4,Joomla,9,Magento,8,Opencart,5,Premium-Blogger,8,Project-C-And-Cplus,7,Templates-HTML,6,Wordpress,48,
ltr
item
sample utsthemes: How to Setup Custom Domain on Blogger with GoDaddy.com 2021 New Panel
How to Setup Custom Domain on Blogger with GoDaddy.com 2021 New Panel
https://blogger.googleusercontent.com/img/b/R29vZ2xl/AVvXsEiUqRKkwMMO6GadMvV7N8zrvNsnUASVkzAWwiL8Tp5QmS6-V3v6b7qqkVVaJ8EX4l6hVnlBqJva2Y9PXBX0rYVDmgoEpN9U9E0xOuAXmb1jtWL9GGmyLPcKmvu3QPH_WxODVRw7MWNStDy_/s16000/How+to+Setup+Custom+Domain+on+Blogger+with+GoDaddy.com+2021+New+Panel.jpg
https://blogger.googleusercontent.com/img/b/R29vZ2xl/AVvXsEiUqRKkwMMO6GadMvV7N8zrvNsnUASVkzAWwiL8Tp5QmS6-V3v6b7qqkVVaJ8EX4l6hVnlBqJva2Y9PXBX0rYVDmgoEpN9U9E0xOuAXmb1jtWL9GGmyLPcKmvu3QPH_WxODVRw7MWNStDy_/s72-c/How+to+Setup+Custom+Domain+on+Blogger+with+GoDaddy.com+2021+New+Panel.jpg
sample utsthemes
https://utsthemes.blogspot.com/2020/11/how-to-setup-custom-domain-on-blogger.html
https://utsthemes.blogspot.com/
https://utsthemes.blogspot.com/2020/11/how-to-setup-custom-domain-on-blogger.html
true
4553758771394867257
UTF-8
Loaded All Posts Not found any posts VIEW ALL Readmore Reply Cancel reply Delete By Home PAGES POSTS View All RECOMMENDED FOR YOU LABEL ARCHIVE SEARCH ALL POSTS Not found any post match with your request Back Home Sunday Monday Tuesday Wednesday Thursday Friday Saturday Sun Mon Tue Wed Thu Fri Sat January February March April May June July August September October November December Jan Feb Mar Apr May Jun Jul Aug Sep Oct Nov Dec just now 1 minute ago $$1$$ minutes ago 1 hour ago $$1$$ hours ago Yesterday $$1$$ days ago $$1$$ weeks ago more than 5 weeks ago Followers Follow THIS PREMIUM CONTENT IS LOCKED STEP 1: Share to a social network STEP 2: Click the link on your social network Copy All Code Select All Code All codes were copied to your clipboard Can not copy the codes / texts, please press [CTRL]+[C] (or CMD+C with Mac) to copy Table of Content